










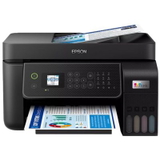
Quick Decision Guide:
1.
Determine what you print and how often (documents vs. photos).
2.
Choose a technology: laser (lots of text, low cost per page) or inkjet (color, photos).
3.
Check the model specifications to ensure the features you need (duplex printing, network connectivity, MFP).
4.
Calculate the operating cost based on the cartridge/toner yield.
5.
If you provide your monthly print volume, the percentage of color printing, and the features you need, we’ll recommend a specific printer model.
Before making a purchase, we invite you to read these articles, which will help you make the best decision based on your needs:
How to Choose a Printer – A Guide for Customers
Laser and Inkjet Printers – Differences and Uses
Printer Specifications – Mysterious Jargon
Printer Cartridge Yield – How to Calculate the Cost Per Page
Yes, every printer is sold with factory-installed tanks
(starter cartridges). These
typically hold less ink or toner
than standard cartridges sold separately. They are included so you can start printing right away without having to buy additional supplies.
In practice, this means that once you take the printer out of the box, you can start printing right away, but with heavy use, you’ll use up the starter cartridge faster and will need a full-size one sooner.
The fastest way to perform a printhead test (nozzle check) on an inkjet printer is from your computer or the printer’s control panel.
How do you run the test from your computer?
1. Turn on the printer and make sure there is plain paper in the paper tray.
2. On your computer, open Control Panel or Settings, then go to the Devices and Printers (or Printers and Scanners)
section 3. Click your printer’s icon and select Printer Properties or Printing Preferences.
4. In the panel, find the Test Print or Print Test Page option.
6. Click Print to have the printer generate a test pattern.
How do I run a printhead test from the printer?
1. Make sure plain paper is loaded in the paper tray.
2. On the touchscreen or using the buttons on the printer’s control panel, go to Settings.
3. Find Maintenance or Tools in the menu.
4. Select Nozzle Test or Nozzle Check and confirm the print.
How to evaluate the test results:
Correct printout—the printout is clear for every color; no lines, gaps, or missing areas are visible.
Clogged nozzles—the test print shows gaps, lines, and missing sections. This means that some nozzles are dried out or have air trapped inside them. In this case, run the Printhead Cleaning function.
More about cleaning the print head:
How do I clean the print head?
To clean the print head:
1. Run a printhead test.
For more information on how to run a printhead test, see the question “When does the printer’s printhead need cleaning?”
If the test clearly shows gaps, broken lines, or missing areas, this means the printhead needs cleaning.
2. Run a
printhead cleaning: - Turn on the printer and make sure it is ready to print.
- In Windows, go to Settings → Printers & Scanners, select your printer, and open its Print Preferences or Properties.
- Go to the Maintenance, Care, or Service tab.
- Select "Printhead Cleaning" and follow the on-screen prompts.
- If your printer has a control panel or touchscreen, you’ll usually find this option in the Tools / Settings / Maintenance menu
.- After cleaning is complete, run a test print (print head test) to check the results.
More about cleaning the print head:
How do I clean the print head?
It’s a good idea to clean the print head when print quality has noticeably deteriorated, even though the cartridges have enough ink. The most common signs are:
✓ white, horizontal stripes on the printout,
✓ broken or faint lines in the text,
✓ missing parts of letters or graphics,
✓ one color missing,
✓ incorrect, distorted, or overly bright colors,
✓ blank or nearly blank pages even though the ink cartridges are full.
This problem often occurs after a long break in printing, because the ink may have partially dried in the print head nozzles.